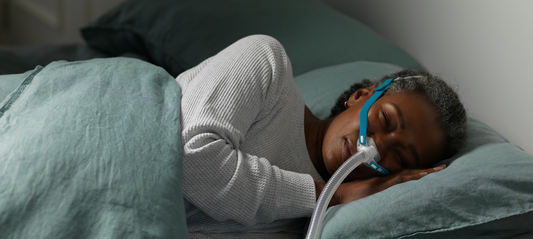
If you’re facing technical difficulties with your AirSense 11, Lofta is here to help! We understand that CPAP issues can be stressful when you rely on your AirSense 11 for a good night's sleep and your overall health. Fortunately, most of these problems can be resolved quickly, allowing you to return to restful sleep.
That’s why our team has developed a detailed guide to troubleshoot common issues with the AirSense 11 model. If the solutions here don't resolve your problem, we’re here to provide additional help. Just call us at 1-800-698-8000 or email us at sleep@lofta.com. Let's dive into some frequent concerns and their solutions.
Commons FAQs for AirSense 11 Issues
The AirSense Start and Stop Features Are Not Working
To start and stop the machine, you simply need to press the power button. You can also enable the SmartStart feature, which allows you to start the machine simply by breathing into the mask or removing the mask when you’re done using your CPAP. It may take a few seconds to turn off. If these features are not working, it’s likely that your mask and hose are connected properly. Fault connections can prevent the machine from starting properly.
My AirSense 11 Won’t Connect to My MyAir App
Occasionally, users may face issues connecting their AirSense 11 to the MyAir app. To fix this, follow these steps:
- Unplug the AirSense 11 and uninstall the MyAir app from your phone.
- Restart your phone and the AirSense 11.
- Reinstall the MyAir app and follow the setup prompts closely.
- If problems persist, ensuring your phone is up-to-date and moving the machine to a location with better cell service might help.
My AirSense 11 Machine Is Not Connecting to WiFi or Cellular Data
The AirSense 11 does not connect via WiFi but instead uses cellular data. If you don’t see any service bars, or if they’re crossed out, try relocating your device to improve signal strength. Because 3G networks have been shut down, your device needs to rely on 4G connections only.
To view your network information, select "My Options" and navigate to the bottom to find "About." Continue scrolling to find details about your Provider and Network Type. If the Provider field is empty, it means you don’t have service. If your network bars are crossed out, this shows a lack of service. Try relocating your device to a different spot to see if you can get a connection.
How to Adjust My AirSense 11 Pressure Settings
Remember, any adjustments to your therapy pressure should be made under the supervision of a healthcare professional. Always consult with your healthcare provider before altering your pressure settings.
My AirSense 11 Isn’t Using Any Water
If your humidifier chamber is full in the morning and your throat feels dry, your machine might be set to automatic mode. This adjusts humidity based on ambient conditions. Switch it to manual mode through the "Climate Control" settings in the "My Options."
How to Adjust Your Climate Control Mode: At the bottom of your home screen, click on the “+ More” option. Here, make sure the humidifier is enabled. If you are using heated tubing, check that the ClimateLine option is also enabled. Then go back to the Home menu and select “My Options.” Make sure that the “Climate Control” setting is on “Manual.” The machine’s sensors may think your room is already humid, so this will override its settings so you can adjust as needed.
How to Test Your Humidifier: If this doesn’t work, check that your humidifier is actually warming up and working. To test your humidifier, first press "+ More" on your home screen's bottom. Activate the "Warmup" setting; an orange water droplet icon should then appear in the top right corner of the display. After about 10 minutes, touch the humidifier chamber. It should feel warm. If it remains cool, your device likely needs to be serviced. If therapy isn't initiated within 20 minutes of enabling the warmup, the device will automatically switch to a cooldown mode.
What Steps Should I Take If My Humidifier Is Leaking?
First, check for any visible damage to the humidifier chamber. Ensure it's not overfilled as it might spill or leak. If you find any cracks or damage, replacing the chamber should resolve the issue.
Can I Use My AirSense 11 Without a Humidifier?
Yes, if you prefer not to use the humidifier, set the "Climate Control" to manual and turn off both the "Humidity Level" and "Tube Temp" in the "My Options" menu. To ensure the machine functions properly, keep the humidifier chamber inserted or use an optional side cover sold by ResMed.
My Nose is Dry or Stuffy After Using My AirSense 11?
Increasing the humidification settings can help alleviate dryness. To do this, press "My Options," then scroll to "Humidity Level" and adjust it to your preferred setting. If you're new to using humidification, begin at level 4 and gradually increase it each night until the dryness is alleviated. If nasal congestion or other discomfort persists, here are 3 Ways to Prevent Nose Discomfort from your CPAP Mask.
What Does the Flashing Blue Snowflake Mean for my AirSense 11?
The blue snowflake means your humidifier chamber is in the process of cooling down. Once the icon vanishes, your water chamber has reached a temperature that is safe to touch.
My CPAP Mask Is Leaking Air
An air leak can be caused by several factors, such as an improper fit, a worn-out cushion, or the wrong mask style. It’s important to note that a small amount of leakage is normal, and there’s an established “acceptable leak rate” of about 24 liters of air escaping per minute.
However, if there is excessive leaking, follow the troubleshooting steps below. After completing each troubleshooting step, make sure to use the “Mask Fit” feature on your AirSense 11. This function will test your mask seal by gradually increasing the pressure from a low setting to your prescribed level. To access “Mask Fit,” tap on “+ More” at the bottom of your main menu screen, then select “Mask Fit.” Put your mask on, and start your machine to test for air leakage.
Air Leakage Solutions for CPAP Therapy
Ensure Proper Mask Fit—Make sure your mask fits properly by loosening the headgear completely and adjusting the straps from top to bottom. The mask should be secure yet comfortable, allowing slight movement without excessive force. As a guideline, you should be able to pull your mask about a half-inch relatively easily.
Clean or Replace Worn Headgear or Cushion—Check your cushion and headgear regularly for wear such as holes or discoloration. If you notice these signs or experience leaks, replace them to maintain a good seal. If you haven't cleaned your mask recently, your skin’s oil may have accumulated and be causing leaks. To achieve the best seal, make sure to clean both your cushion and your face before use.
Explore Different Mask Styles—If leaks continue, consider trying different mask styles. Many users test several masks to find the right one. For example, nasal masks are ideal for those with facial hair or those who tend to feel claustrophobic. Full-face masks are beneficial for mouth breathers or those with nasal congestion.
Use a CPAP Mask Liner—For extra leak prevention and comfort, consider using a CPAP mask liner. This liner creates a barrier between your face and the cushion, helping to stop leaks and increase comfort during use.
What Should I Do If There Are Water Droplets in My Mask or Hose?
Condensation in your CPAP tubing, often referred to as CPAP rainout, happens when the air inside the tubing is at a different temperature than the air outside it. You can better insulate your hose by wrapping it in a soft cloth, but a more effective solution is using ClimateLineAir Heated Tubing for AirSense 11.
This heated tubing enables Auto Climate Control on your device and allows you to set the tubing temperature manually. By heating the air consistently as it moves through the tubing, the humidity is maintained without condensing on the tube's walls. This prevents water from splashing onto your face or making gurgling noises in the hose, ensuring a disturbance-free sleep.
My Mouth Feels Super Dry After Using CPAP Therapy
If you're using a full face mask and find your mouth dry during CPAP use, consider using heated humidification if you haven't already. If you're already using this feature, it might help to increase the humidification level slightly.
For those using a nasal or nasal pillow mask, air may be escaping through your mouth at night. This not only causes dryness but also diminishes the effectiveness of their therapy, impacting benefits like better energy and mood. To address dry mouth, adding a CPAP chinstrap could help your jaw stay closed during sleep.
My Mouth is Dry and My Humidifier Chamber Empties By the Morning
This is a more common problem for the AirSense. If you’ve already tried our suggestions above, here are some more potential solutions:
Ensure Proper Room Temperature and Humidity
If your room is too cold or dry, you may need more consistent humidification. Start by using an insulated tube wrap or a heated hose. These can help maintain the air temperature inside the tube, preventing it from cooling down and losing humidity on its way to you.
Adjust Automatic Climate Control
If you have a heated hose, you can use automatic climate control, which is designed to provide the ideal level of humidification. However, issues like hose or mask leaks and environmental conditions can sometimes cause the system to overcompensate, leading to over-humidification. To adjust, go to your "My Options" menu and find the humidity level settings. Start with a lower setting, such as 3 or 4, and increase the level each night until you find a comfortable setting that doesn't use all the water in your tank.
Switch to Automatic Climate Control
If you're experiencing issues with a manual setting, switching to automatic climate control might help. Assuming you're using a heated hose, enable automatic climate control and tube temperature in your "My Options" menu to see if this resolves the humidification problem.
Increase Heated Tubing Temperature
If you're using a heated hose and your therapy air is cooling too much, try increasing the tube temperature one setting at a time each night. This can help the air in the tube retain more moisture. In the "My Options" menu, find "Tube Temperature" and raise it by one level. Continue adjusting the temperature each night until the problem is resolved, but ensure it's not too hot for your comfort.
My AirSense 11 Screen Is Black
A black screen can indicate that the machine is in sleep mode or there might be a power issue. Tap the screen to wake it up. If it doesn't light up, check all connections and make sure the power supply is functioning. If issues persist, the machine may need to be repaired.
What Steps Should I Take If My Humidifier Is Leaking?
First, check for any visible damage to the humidifier chamber. Ensure it's not overfilled, as it might spill or leak. If you find any cracks or damage, replacing the chamber should resolve the issue. Keep in mind that the chamber should be replaced every six months regardless of wear.
I Am Having Trouble Transmitting Data and Prescription Settings
If your therapy data isn't reaching your account, or the prescription settings haven't been applied to your device, several issues could be at play:
Check MyAccount: Confirm that your MyAir account is correctly configured and that your machine's serial number matches the one recorded in your MyAir account.
Turn off airplane mode: Check if there's an airplane icon at the top right corner of your screen. If present, your device isn't transmitting any data. To turn off Airplane Mode, tap "+ More" on your main menu, scroll to "Airplane Mode," tap it, and switch it off.
Find a better wireless signal: Check the signal strength bars in the top right corner of your screen. If they're low, reposition your machine to a spot with better wireless reception. After moving it, unplug the machine for 60 seconds, plug it back in, and leave it there for a few hours.
Reboot your device: If your AirSense 11 has been continuously running without being turned off for months at a time, it might need a reboot. Unplug it for 60 seconds and then plug it back in to refresh its system.
Wait to turn off your device: Avoid powering down your machine immediately after therapy. Data transfer to the cloud isn't instantaneous and requires the device to be on for a while post-therapy. Leave your machine on and check after a couple of hours to see if the data has been transferred.
Be aware of travel restrictions: If you're using the machine outside the country or region where you bought it, this could interfere with data transfer. Additionally, make sure your MyAir account is correctly set up and that your device’s serial number matches the one registered in your account.
SmartStart and SmartStop Isn’t Working When I Breath Into My Mask
If SmartStart doesn't automatically initiate therapy when you breathe into the mask, make sure the setting is enabled and your first breath is strong enough to activate it. For SmartStop, ensure it's enabled and give it a few moments to detect that the mask has been removed before it stops therapy.
SmartStart is Active but Not Triggering Automatically
If your device doesn't start automatically even though SmartStart is enabled, try taking a deeper initial first few breaths. If this doesn’t work and all your mask and tube settings are correct, consider sending in your machine for repair, or simply using the power button instead.
SmartStop is Active but Doesn’t Automatically Stop
If removing your mask doesn’t immediately stop the device, wait a few moments for the machine to detect the mask has been removed. This delay is intentional. Be aware that this feature may not function optimally with nasal pillow masks at pressures below seven cmH2O. If adjustments don’t help, press the power button to stop therapy.
AirSense 11 System Fault, Error 4 and Error X
Error 4: This indicates a more complex issue, potentially from your AirSense 11 overheating. Unplug the device and move it to a cooler, well-ventilated area. Allow it to cool for an hour before reconnecting power.
Check the air filter to ensure it's free of blockages and that there’s adequate space around it for airflow. If necessary, replace the filter. If excess water is found in your CPAP hose, drain it. Then, restart your machine.
If your device displays this error or another unlisted system fault, contact Lofta Care for repair to avoid voiding your warranty. Internal mechanical or electronic issues may be the cause, and a professional examination is likely necessary.
Error X: Unfortunately, ResMed does not offer at-home solutions for this error code. If you receive Error X, you need to send your ResMed in for repair. Do not open the machine yourself, as this will void the warranty.
Have Questions? Lofta is Here to Help
We hope this guide helps you quickly address any issues with your AirSense 11. If you're still experiencing difficulties, our expert team is just a phone call away. We're here to ensure that your therapy is as effective and comfortable as possible. Please contact us with any other questions you may have regarding sleep apnea and CPAP therapy.


